


Here’s a little tutorial that I put together based on my own ideas of how to make a ring pillow. I’m a big fan of pretty vintage style fabrics so this is what I have gone for. You can use any kind of fabric you like for your own designs. I’ve also decorated my cushion with little flowers but you could use something a bit different like sparkly buttons or gems. Get your creative thinking cap on and give it a whirl.
You will need:
-
A sewing machine or needle and thread if you are doing it by hand.
-
Your choice of fabric
-
Lace
-
Ribbon
-
Fabric flowers
-
Wadding
-
Scissors
-
Tape measure
1. Select your fabric and lay it out ready to use

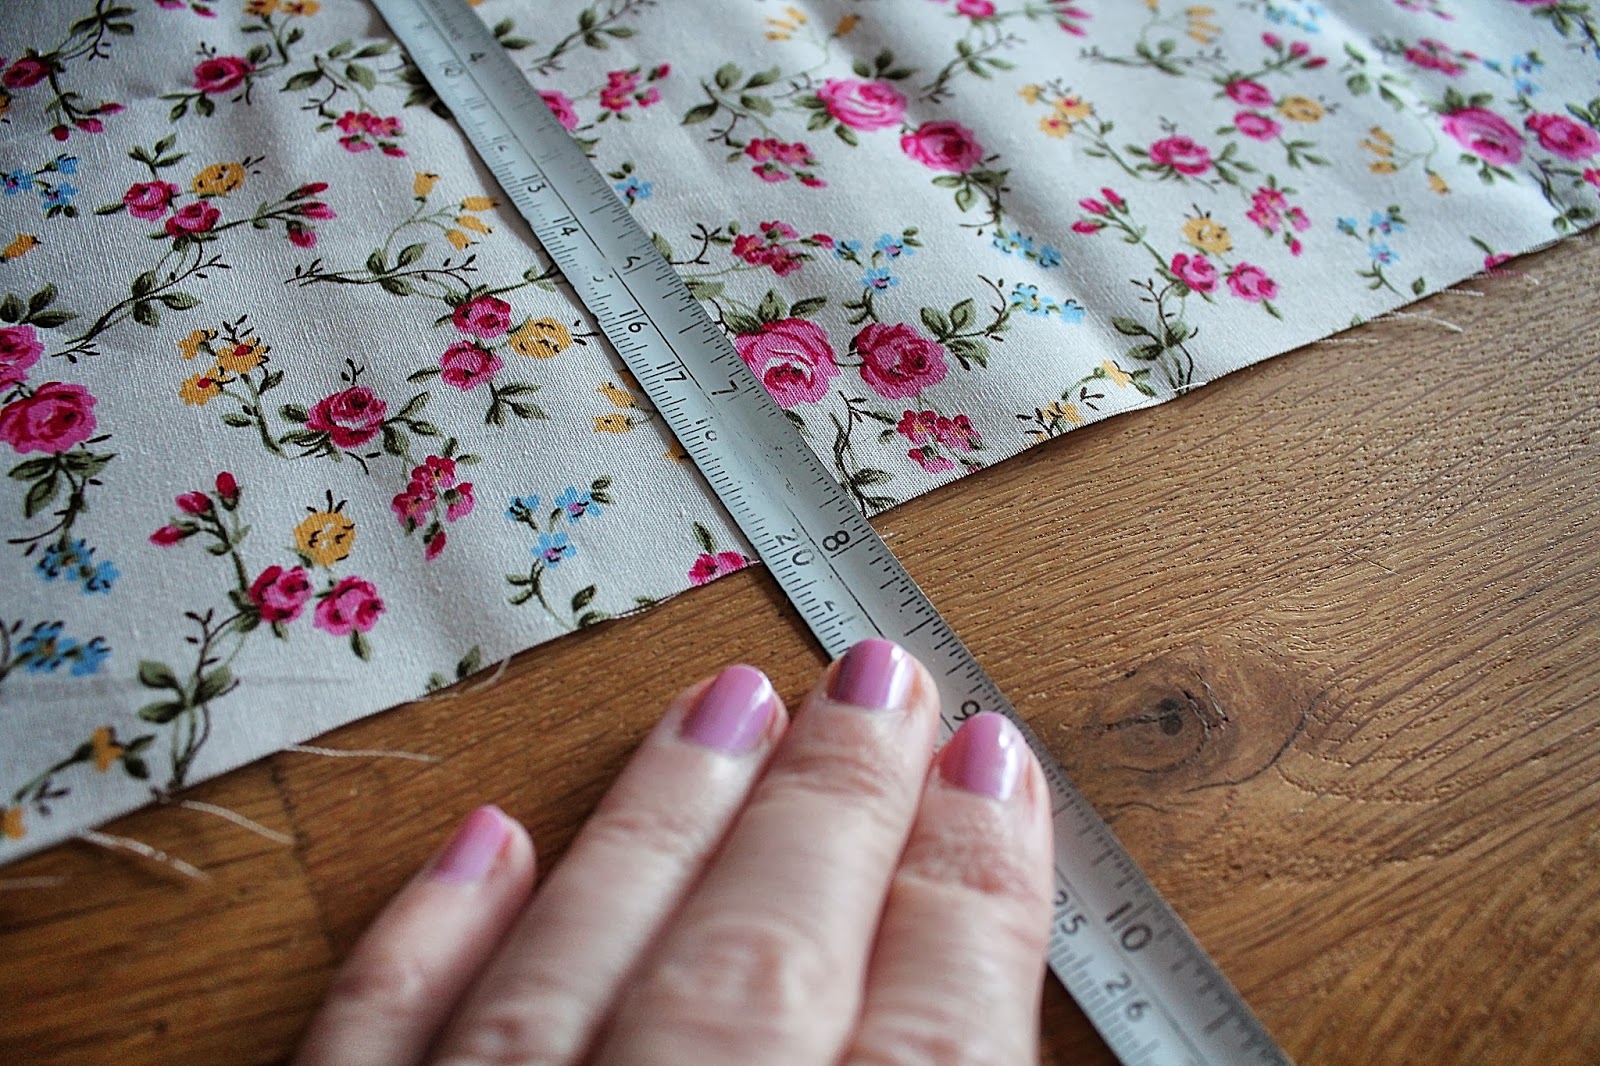
2. Measure out two squares. I’ve gone for 8″ squares as this seems to be about the standard size of a ring pillow but the size is really your choice. You may want to iron your pieces at this stage too if they are very creased. I found that the pieces creased when turning the fabric inside out so I opted to iron them once I had sewn them together.

3. Measure out a piece of lace twice the size of your square so that you can fold it over like this…

4. Sew half of the lace on to the patterned side of one of the fabric squares by running a stitch straight down the middle. The other half will be hanging off the end of the fabric at this point.

5. Now that the lace is attached fold the other half over and pin it on top of the stitched lace. The loose piece of lace will create your handle.


6. Place the fabric pieces on top of each other so that the patterned sides are facing inwards.

7. Sew the pieces together leaving a 2-3″ gap so that you can turn the fabric inside out (the right way round again).


8. once you have turned the pieces the right way round make sure that the lace is on each side of the cushion. If both pieces are on one side then pull the loose piece round to the other side. You can iron any creases out of the fabric taking care to avoid the lace as it may melt under the heat of the iron.

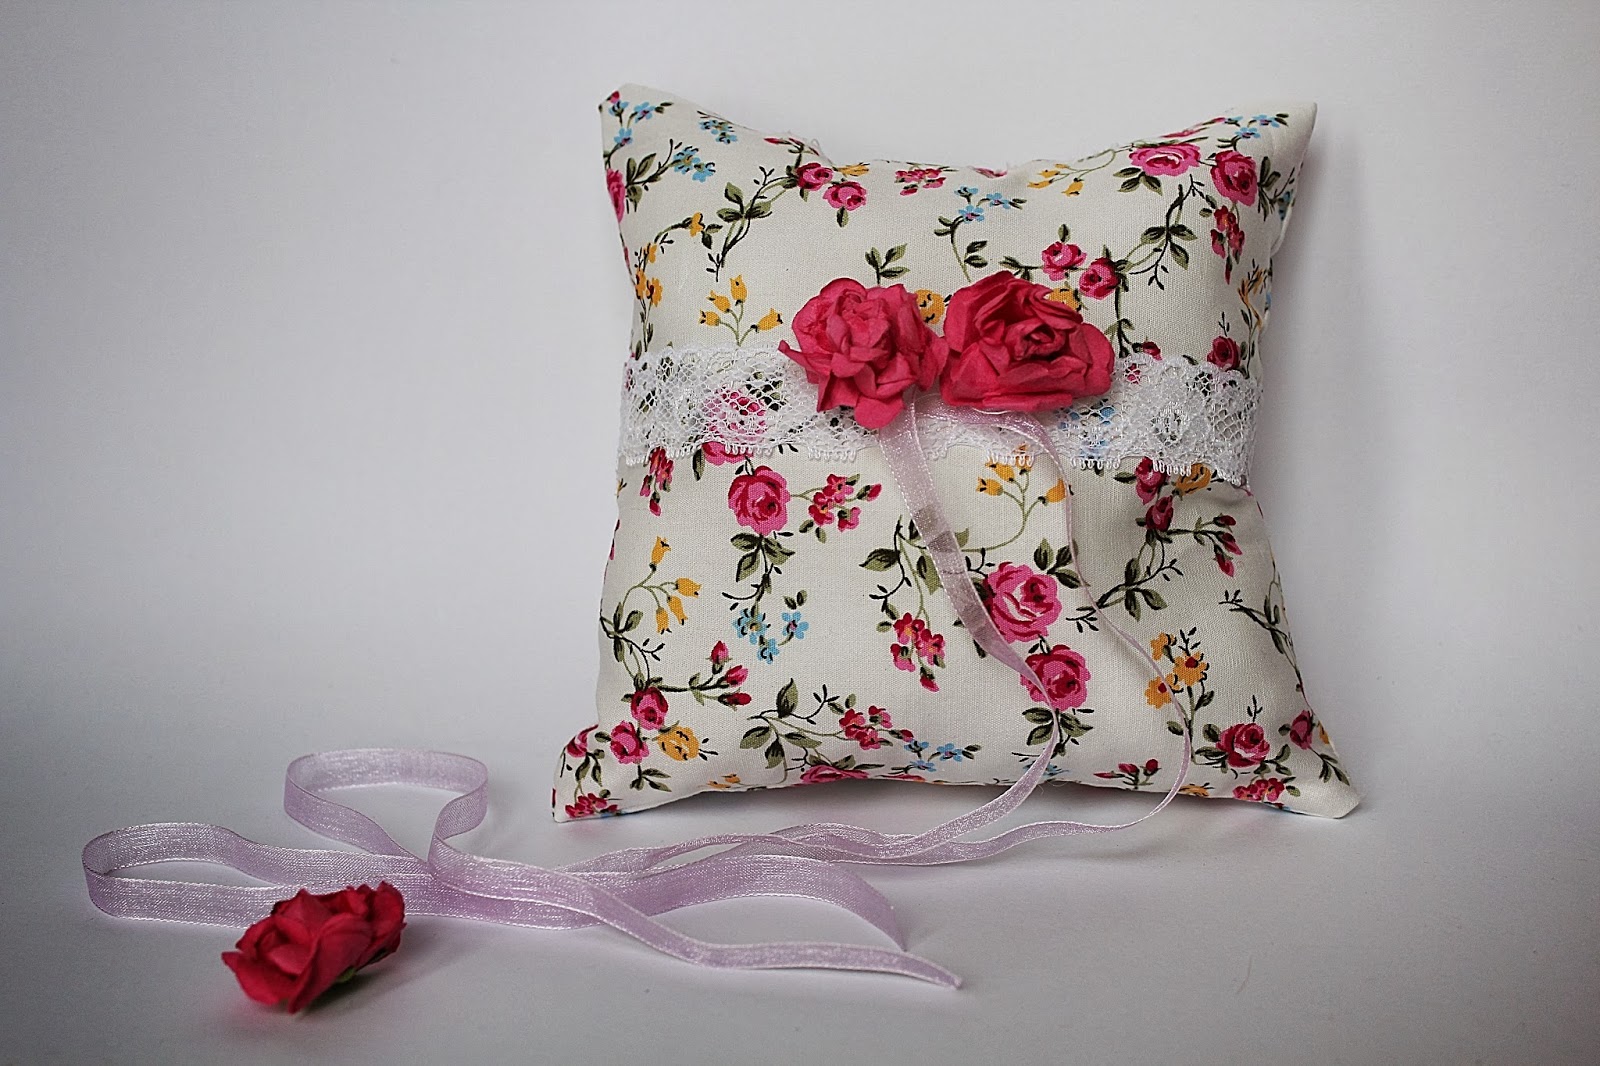
9. Sew your piece of ribbon on to the side with the lace stitched down. Put a few stitches in the middle of the ribbon to attach it to the cushion. You will attach your rings to this ribbon. Sew your flowers over the top to hide the stitching on the ribbon.
You may want to do this part before sewing your pieces together but I prefer to do it this way so that I know it will be symmetrical and my flowers will be exactly in the middle of the cushion. If you leave a big enough opening so that you can get your fingers inside the cushion then you should be fine doing it like this.

10. Fill with wadding by breaking small pieces off and making sure that you push it into the corners.

11. Sew up the opening by hand and you’re done!

You should be able to slip your hand underneath the lace on the back so that this can be used as a handle.

The ring pillow complete.

And if you want to know how to attach your rings here is a little tutorial that I found. http://hanabrides.blogspot.co.uk/2007/12/how-to-tie-wedding-rings-to-ring-pillow.html
Happy Wednesday 🙂
Michelle x


